


Background Intro
Welcome to our transformative hair journey! If you're looking to add a dash of color and spice up your style, dyeing your hair topper can be a game-changer.
In this blog post, we'll delve into the world of color magic, sharing tips, tricks, and step-by-step instructions on how to dye hair at home like a pro. Get ready for a head-turning transformation that will leave you feeling confident, stylish, and ready to conquer the world!
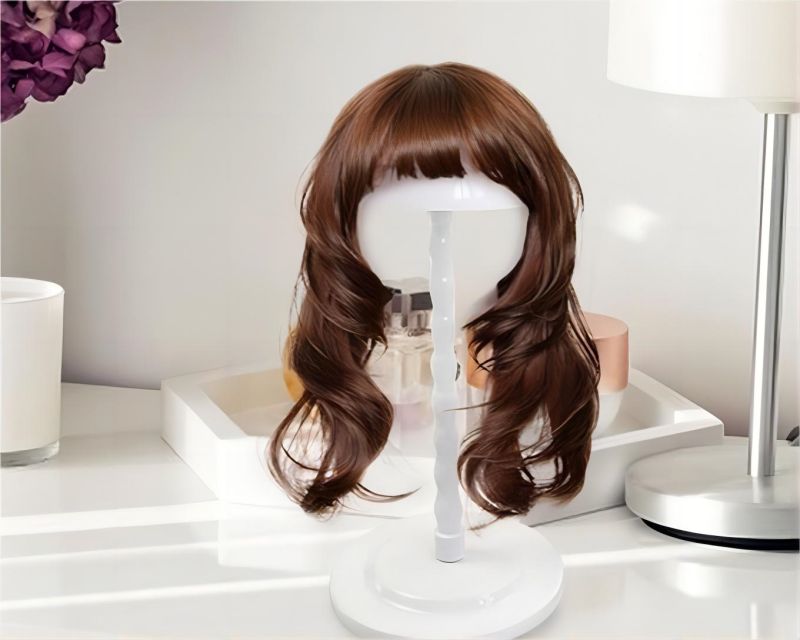
Can All Hair Toppers be Colored?
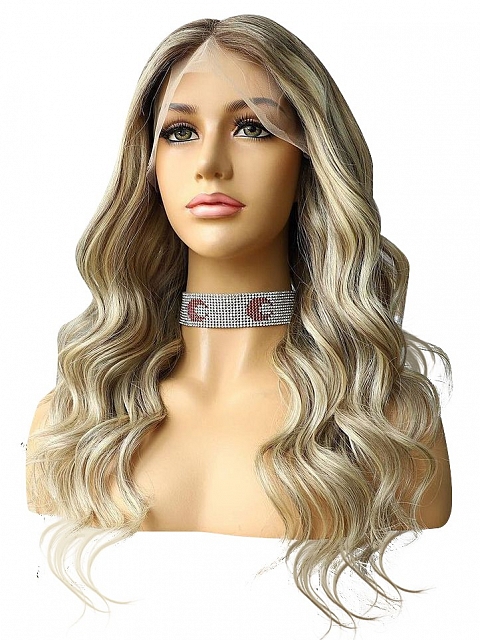
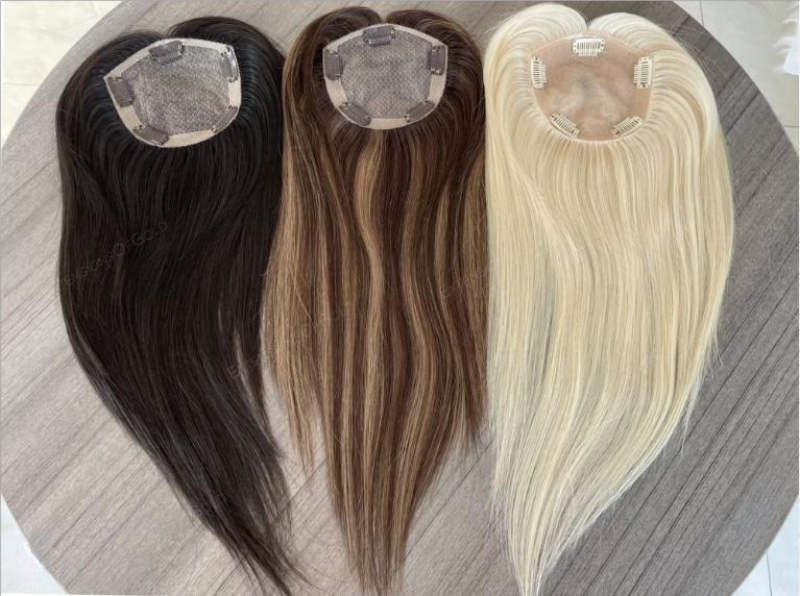
When it comes to coloring hair toppers, not all options are created equal. The colorability of a hair topper depends on its construction material, whether it's synthetic or human hair. Synthetic hair toppers are generally not intended for dyeing due to the limitations of the synthetic fibers, they cannot withstand chemical processes (such as hair bleaching) which can cause damaged hair. On the other hand, human hair toppers can often be colored like natural hair, offering versatility in dyeing, highlighting, and lowlighting. However, it's essential to consult the manufacturer or professional colorist. of your specific topper to determine its colorability and receive any necessary guidelines or recommendations before attempting to color it.
What can You Expect from Coloring Your Hair Toppers?
Coloring your topper can bring about a few noticeable changes. Firstly, it will alter the color of the topper, allowing you to match it with your own hair color or try out new shades. With the new color, you'll also have increased styling options, such as different hairstyles, highlights, or lowlights. Overall, coloring your topper can boost your confidence and make you feel more comfortable wearing it by expressing your unique style. Under no circumstances will the hair dye interfere with hair growth. If you want more radiance, choose a lighter shade. If you want to regain original color, simply stop coloring your hair and let your natural hair grow back. Following proper techniques and seeking professional advice can ensure a successful outcome.
Related: Say Goodbye To Thinning Hair: Effective Strategies For Promoting Natural Hair Growth
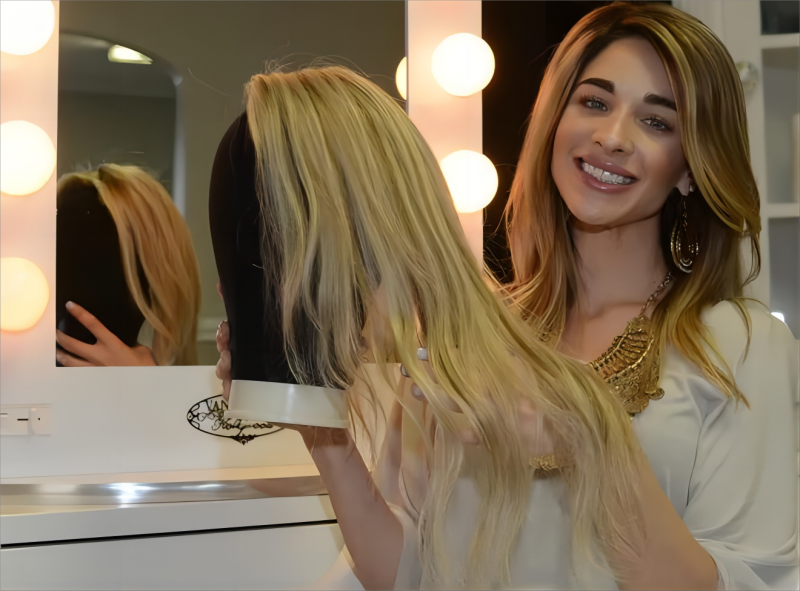
How to Achieve Gorgeous Color on Your Hair Toppers?
Achieving gorgeous color on your hair topper is an exciting process that can elevate your style and boost your confidence. Here are some steps to help you achieve that stunning hair transformation.
Related: Wig Dyeing 101: Detailed Steps And Professional Tricks For Ideal Color
Step #1: Choose the Right Color
Selecting a suitable dye shade requires careful consideration to ensure it seamlessly blends with your natural hair. Here's how you can choose the right shade:
-
Determine your natural hair color. Assess the base color of your natural hair and identify its undertones. This will serve as a base for selecting a topper shade that closely matches your existing hair.
Related: 36 Fabulous Blonde Hair Color Ideas For A Natural Look
-
Analyze your hair type and texture. Consider the texture, thickness, and density of your hair when choosing a topper shade. The topper should blend seamlessly with your hair, so it's important to select a shade that matches both the color and texture.
Related: How To Create The Flawless Hair Care Regimen For Your Hair Type?
-
Evaluate your desired outcome. Determine whether you want your topper to match your own strands exactly or if you want to experiment with a slightly different shade. Some people prefer to add highlights, lowlights, or subtle variations in color for a more natural look.
-
Consider your skin tone. Ensure the hair topper shade complements your complexion. Warm undertones often suit shades with golden or reddish tones, while cool undertones pair well with cooler or ashier colors. Neutral undertones can generally work with a wide range of colors.
-
Seek professional guidance. Consult with a hairstylist who specializes in hair toppers. They can guide you through the process, recommend suitable shades based on your natural hair and skin tone, and even help customize the topper to reach a seamless integration.
-
Test before finalizing. If possible, obtain swatches or small samples of the topper shades you're considering. Hold them against your natural hair under different lighting conditions to determine which shade blends most naturally.
By taking these steps, you can ensure a seamless and perfect match between your hair topper and natural hair.
Step #2: Prepare the Workspace
To dye a topper safely and effectively, follow these simplified steps:
Find a well-ventilated space
-
Choose a well-ventilated area with good airflow to avoid inhaling dye fumes.
-
Opt for a space with natural light, but avoid sunlight to prevent uneven drying.
-
Ensure you have enough room to work comfortably on the topper.
-
Protect the surrounding surfaces by using a cloth or plastic sheet.
-
Use additional bright lights if natural light is limited.
-
Follow the dye instructions carefully, wear gloves, use proper tools, and conduct a patch test if required.
Protect your work area
-
Cover the workspace with a towel or plastic sheet to catch any drips or spills.
-
Make sure the covering extends beyond your immediate working area to protect surrounding surfaces.
-
Secure the edges of the covering with tape or weights to prevent accidental movement.
-
Consider covering nearby items or furniture with additional towels or sheets for extra protection.
-
Clean up any spills promptly by gently blotting them with a clean damp cloth or paper towel, without spreading the dye further.
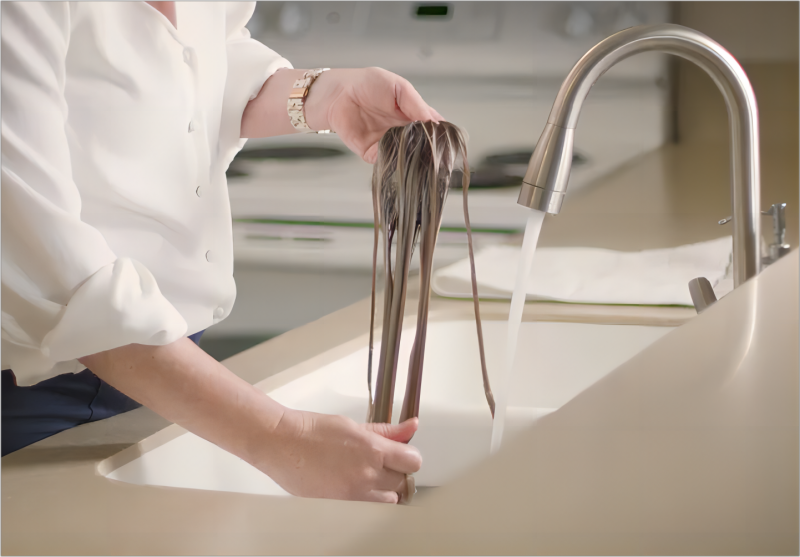
Step #3: Detangle and Wash the Hair Topper
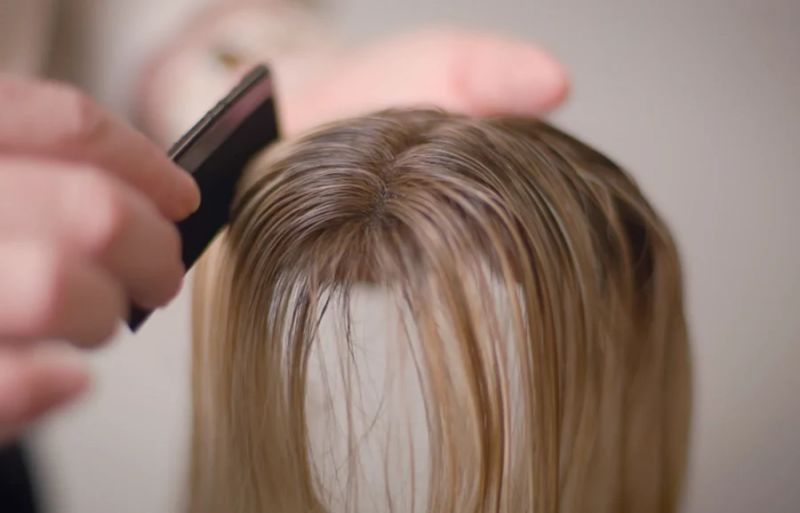
You need to detangle the hair topper and ensure that it's clean and ready for the dyeing process. This will help get better color results and maintain the overall health of the hair. Here are some easy-to-follow steps:
Remove tangles
-
Use a wide-toothed comb specifically designed for detangling.
-
Start from the ends of the hair and work your way up towards the roots.
-
Be gentle to avoid causing damage or breakage to the hair.
-
Take your time and be patient, especially if the hair is prone to tangling.
-
Once the hair is free of tangles, you can proceed with the dyeing process.
Wash the hair topper
-
Wet the hair topper thoroughly with lukewarm water.
-
Apply a small amount of mild shampoo to your hands and gently work it into the hair in a downward motion to make hair feel soft.
Related: Silky&Soft: 20 Hacks For Restoring Human Hair Wig's Glossy Texture
-
Avoid vigorously rubbing or tangling the hair as this can cause damage.
-
Rinse the topper under running water until all the shampoo is removed.
-
Make sure to rinse the hair thoroughly to prevent any residue from remaining.
Air dry completely
-
Gently squeeze out the excess water from the topper without wringing or twisting.
-
Lay the topper on a drying rack in a well-ventilated area.
-
Allow the topper to air dry naturally without using any heat tools or applying direct heat.
-
Avoid touching or manipulating the hair while it is drying to minimize frizz or tangling.
-
Wait until the topper is completely dry before moving on to the next steps of the dyeing process.
Step #4: Perform a Strand Test
Performing a strand test is a crucial step to take before dyeing your hair topper. It helps you determine the final color result and assess the compatibility of the dye with the topper's fibers. Here's how you can perform a strand test:
-
Select the hair strand. Choose a small section of hair from your topper that is representative of the overall color and texture. This will help you gauge how the dye will interact with the topper's fibers.
-
Prepare the dye mixture. Follow the instructions provided with the hair dye product to prepare the dye mixture. Measure and mix the appropriate amounts of dye and developer as directed.
-
Apply the dye to the strand. Using a applicator, apply the dye mixture evenly to the selected hair strand. Ensure that all the fibers are saturated with the dye, from root to tip.
-
Set the processing time. Refer to the hair dye product instructions to determine the recommended processing time. It's crucial to follow these guidelines to get accurate results. Use a timer to keep track of the time accurately.
-
Rinse and evaluate. After the designated processing time, rinse the dyed hair strand thoroughly with lukewarm water until the water runs clear. Take note of the color achieved on the strand.
-
Dry and assess the results. Allow the dyed hair strand to air dry or use a blow dryer on a cool setting. Once dry, evaluate the color outcome. Compare it to your desired result and consider whether any adjustments need to be made to the dye formulation or processing time.
-
Check for Damage or Undesirable Effects. Inspect the condition of the hair strand after the strand test. Look for any signs of damage, breakage, or negative reactions. Pay attention to factors like excessive dryness, brittleness, or loss of elasticity.
Related: Hair Damage: What Causes It And How To Deal With It
This step is essential in order to avoid any potential problems or dissatisfaction with the final results. By following these steps, you can ensure a more successful hair dyeing experience for your topper.
Step #5: Mix the Hair Dye
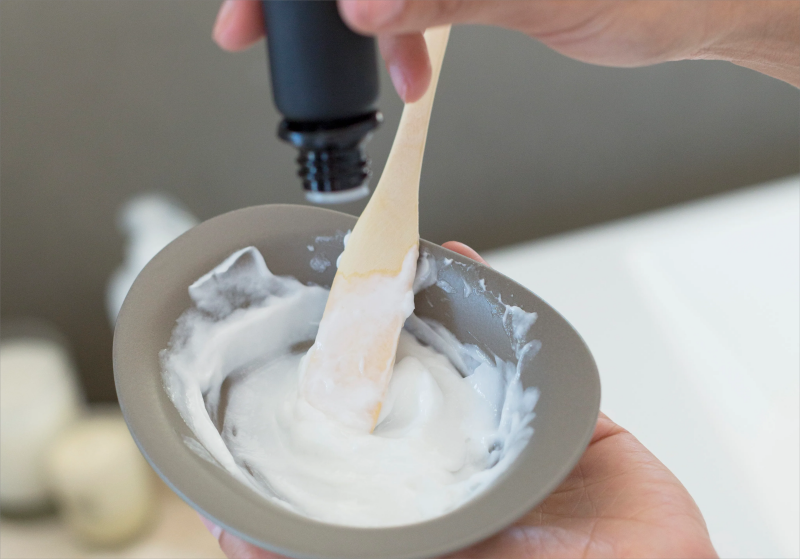
To mix hair dye for dying a hair topper, you will need to follow these general steps:
-
Gather your materials. Hair dye (specifically formulated for synthetic or human hair), mixing bowl, plastic mittens, applicator brush or old clothing to protect your surroundings.
-
Prepare the hair dye. Follow the instructions on the dye packaging to determine the exact amount of dye and developer to mix. Some dyes come pre-mixed, while others require mixing with a developer. Make sure to choose the appropriate developer strength based on the desired color outcome and the condition of the topper.
-
Mix the dye. Pour the recommended amounts of dye and developer into the mixing bowl. Use a spoon to thoroughly combine the two components until they form a smooth, consistent mixture. Ensure there are no lumps or clumps in the mixture.
Remember to always carefully read and follow the instructions provided by the specific dye brand you are using, as different products may have slightly different guidelines.
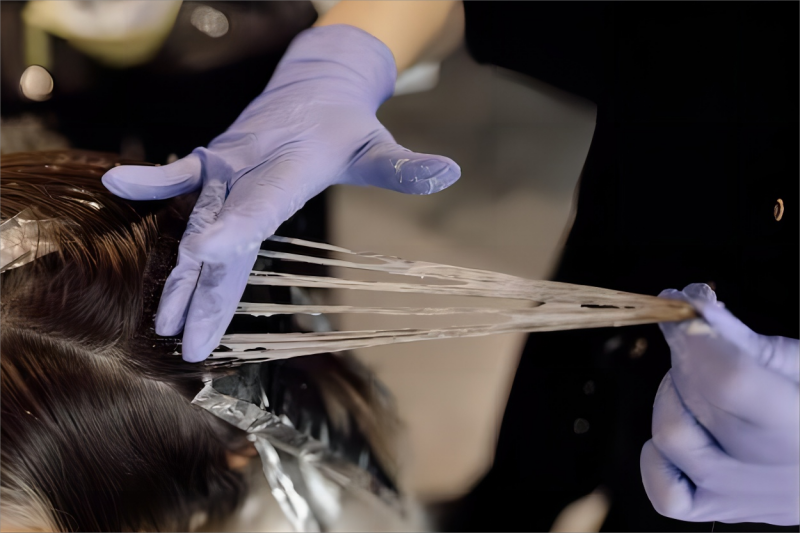
Step #6: Apply the Dye to the Hair Topper

To apply dye to a hair topper, follow these steps:
-
Divide the hair topper into manageable sections. Remove any tangles or knots. Divide the hair into several smaller sections using clips or hair ties. The number of sections will depend on the size and thickness of the toppers.
-
Start with a bottom layer. Begin sectioning the hair from the bottom layer, working your way up towards the top layers. This ensures that each section is evenly coated with the dye and prevents overlapping or missing spots.
-
Secure the unsectioned hair. As you work on one section at a time, secure the remaining unsectioned hair out of the way using clips or hair ties.
-
Put on protective gloves. Wear disposable plastic gloves throughout the application process to protect your hands from staining and potential skin irritation.
-
Start at the roots. Using a nozzle of an applicator bottle, apply the hair dye mixture to the roots of the sectioned hair. Ensure that the dye is evenly distributed along the roots, as they tend to require more color coverage.
-
Work through the length. After applying the dye to the roots, use the your fingers to gently comb the dye through the rest of the section, moving towards the ends of the hair. Make sure that all colour is deposited evenly and begin the waiting game.
-
Repeat for each section. Move on to the next section and repeat the process, starting with the roots and working towards the ends. Take your time and ensure each section receives sufficient color saturation.
-
Separate and check for any missed spots. Once all the sections are coated, carefully separate the hair strands within each section and check for any areas that might have been missed. Apply a small amount of dye specifically to those spots and blend it in.
Remember to handle the hair topper gently throughout the dyeing process to prevent tangling or damage.
Step #7: Wait for the Processing Time

To clarify, you can cover the hair topper with a plastic or shower cap after applying the dye. Here's how:
Cover the hair topper
-
After you have applied the dye to the topper and followed the instructions for processing time, gather the hair on the topper together gently.
-
Carefully place a plastic or shower cap over the entire topper. Make sure it completely covers the hair and fits snugly.
Allow the dye to process
-
Check the recommended processing time specified by the dye manufacturer. This time can vary depending on the type and brand of the dye used.
-
Set a timer or keep track of the time using another method to ensure that you don't leave the dye on for too long or rinse it off too early.
-
During the processing time, it's important to avoid touching or disturbing the hair topper to prevent any potential smudging or uneven color distribution.
Step #8: Rinse and Condition
After dyeing your hair toppers, it is essential to rinse and condition it properly to sustain its quality and longevity. Here's a step-by-step guide:
-
Rinse out dye. After applying the dye, rinse it out thoroughly from the topper.
-
Apply conditioner. Gently squeeze out excess water and apply conditioner to the topper. Focus on the mid-lengths and ends.
-
Detangle hair. Use your fingers or a wide-toothed comb to gently detangle the topper.
-
Allow conditioner to penetrate. Leave the product in the hair for the recommended time specified on the product packaging.
-
Rinse thoroughly. Rinse the topper with lukewarm water to remove all the product.
-
Pat dry. Gently pat the topper with a towel to remove excess water.
-
Air dry. Allow the hair topper to air dry naturally by placing it on a wig head or a cotton.
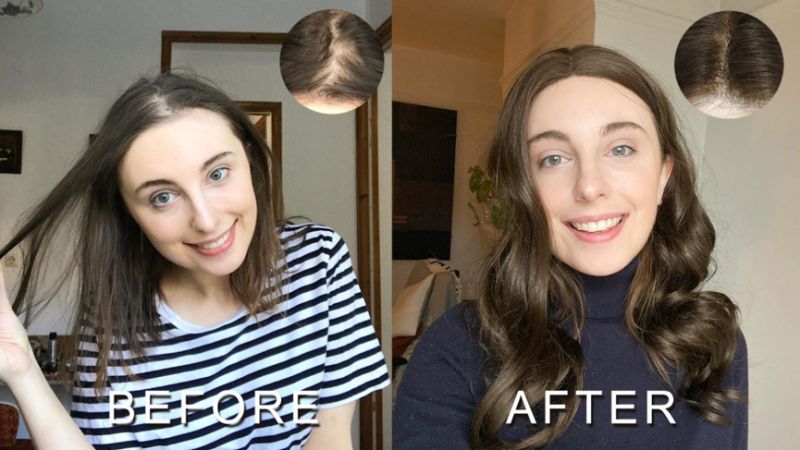
By following these steps, you'll help keep your dyed topper in excellent condition, ensuring its vibrancy and longevity.
Step 9: Style and Maintain
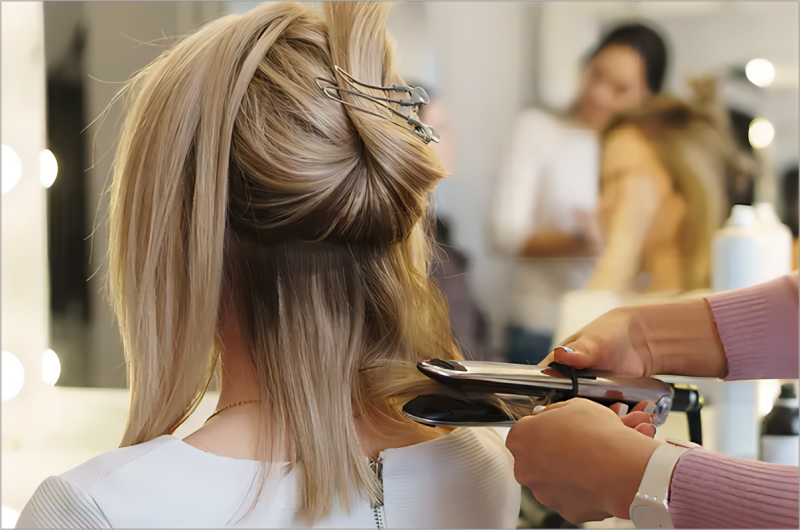
Styling and maintaining your hair topper is crucial for keeping it looking its best. Here are some tricks to help you style and maintain your topper:
-
Style to your taste. Once the topper is dry, you can style it as desired using appropriate heat styling tools if compatible with the material of the topper. Use a brush designed for the specific type of hair (human hair or synthetic) to reach the desired style.
-
Maintain regularly. To keep the topper looking its best, maintain it regularly by gently brushing or combing through the hair to prevent tangling and matting. Be gentle when handling the hair to avoid any damage or breakage. Regular deep conditioning your hair toppers.
-
Store properly. When not in use, store the topper on a wig stand or in a breathable storage bag to help maintain its shape and protect it from dust and tangling. Keep it away from direct sunlight or excessive heat, as this can cause color fading or damage.
-
Clean as needed. If the opper becomes dirty or needs refreshing, follow the cleaning instructions provided by the manufacturer. Use specialized shampoos and conditioners formulated for hair toppers to ensure proper care.
By following these steps for styling and maintaining your topper, you can enjoy a beautiful and long-lasting piece that enhances your style and boosts your confidence.
Related: How To Attach And Maintain Hair Toppers For Beginners?
How Long does the Color of Your Hair Toppers Last?
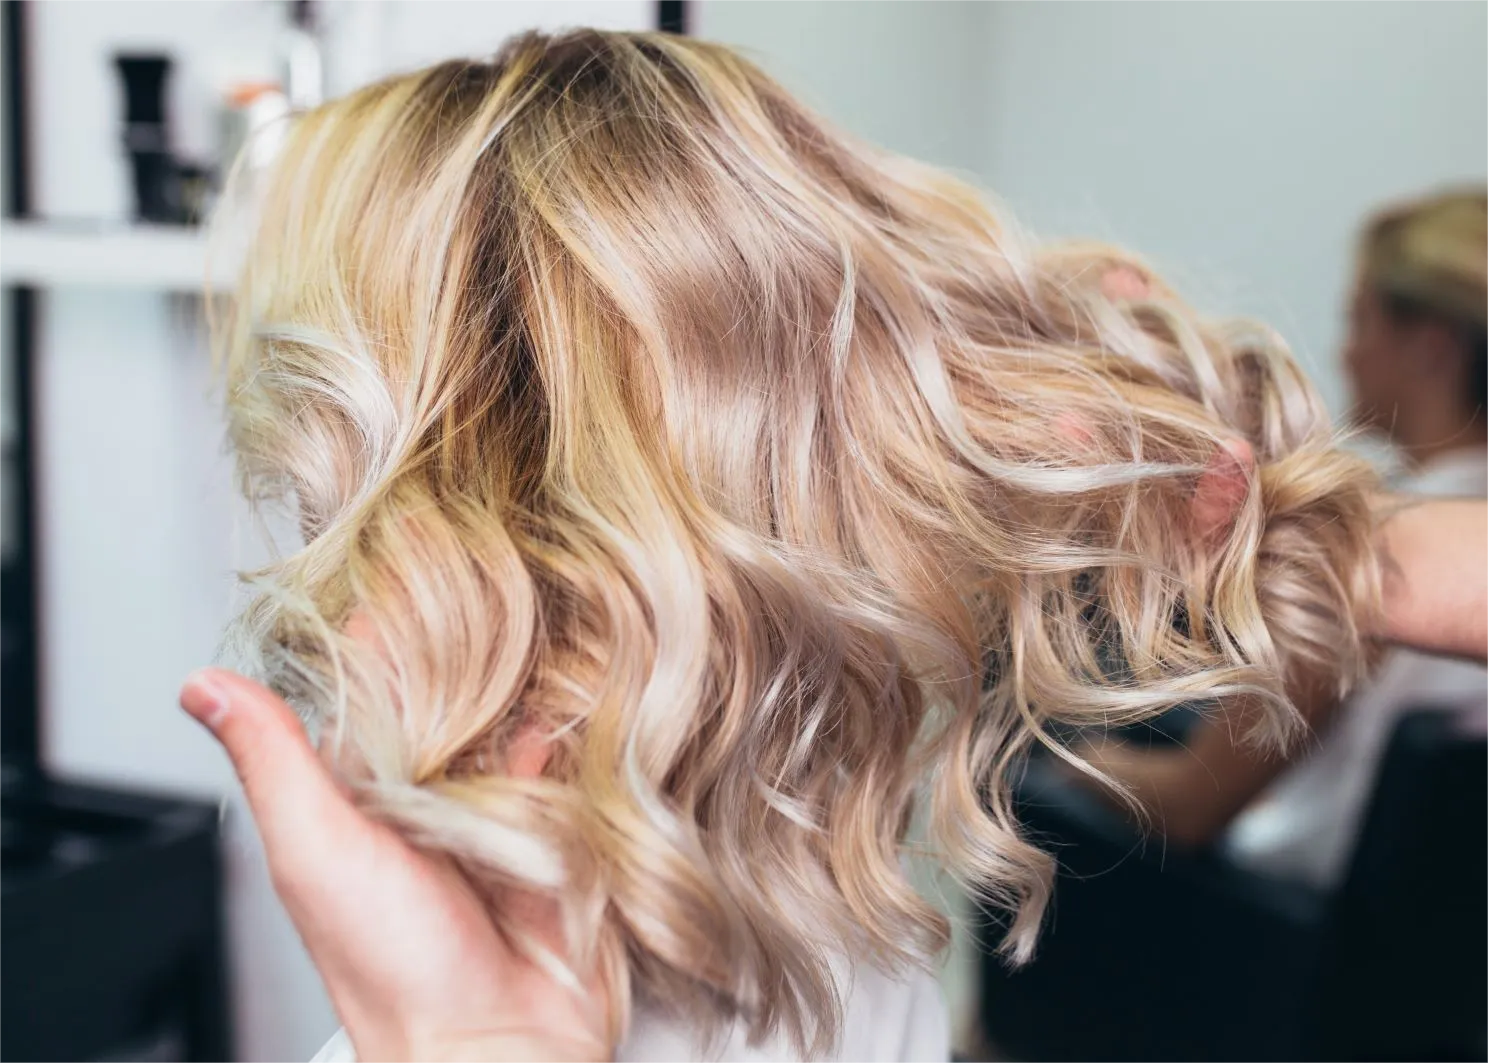
The duration of the color on your topper depends on various factors. Synthetic hair toppers usually have a permanent color that remains consistent over time unless exposed to excessive heat or sunlight. Human hair toppers typically last around four to eight weeks before noticeable fading occurs. Darker shades( like brunette hair or dark brown hair) tend to last longer than lighter ones(like light brown). If you dye your hair silver, the color may last a very short time. Regular touch-ups may be needed to maintain color intensity. Everyone's hair is different. The results can vary based on dye quality, hair care routine, and external factors.
Related: Eco-Chic: Transform Your Haircare Routine With Sustainable Choices
Final Thoughts
With the art of shade selection, preparation, and flawless application, let your inner color wizard shine. Whether you have long hair or short hair, thin hair or thick hair, you can change the color to enhance your style.
So, rock your head-turning dream hair with pride. Be the trendsetter, embrace your individuality, and celebrate your colorful creation. Let your hair boldly proclaim, "I am confidently me!"
Images credit: Google, Pinterest, YouTube.