Background Intro
Are you tired of struggling with a lace wig that just won't blend in with your natural hairline? Say goodbye to the frustration and hello to flawless results with this easy trick: melting the lace! Whether you're a seasoned pro or a first-time wig wearer, our step-by-step guide will show you how to melt the lace on your wig like a pro. From cutting the lace to achieving a seamless finish, we've got you covered. Get ready to turn heads with a stunning, natural-looking hairline that'll have everyone wondering: is it real or is it a wig?
Related: How To Style Your Wig Like A Pro: Step-By-Step Tutorials
Why lace front wigs so popular?
Lace front wigs have become popular for several reasons. One reason is that they provide a more natural-looking hairline compared to traditional wigs. The lace material used in the front of the wig allows the wearer to create a seamless hairline that blends with their natural hairline. Another reason for their popularity is the versatility they offer. Lace front wigs can be styled in various ways, including updos and ponytails, which is not possible with many other types of wigs. Furthermore, lace front wigs come in a wide range of styles, colors, and textures, making it easy for wearers to find a wig that matches their natural hair or a desired look. They are also available at different price points, making them accessible to a broad range of consumers. Overall, lace front wigs have become increasingly popular because they offer wearers a natural and versatile hair styling option that meets their individual needs.
Can lace front wigs damage your hair?

When worn properly, lace front wigs should not damage your hair. In fact, they can be a protective hairstyle that allows your natural hair to rest and grow without the stress of styling and manipulation. However, if the wig is too tight or if it's not removed and cleaned regularly, it can cause problems such as hair breakage, scalp irritation, and even hair loss. It's important to make sure that you're not pulling your own hair too tightly when installing the wig, and that you're not leaving it on for too long without giving your scalp a break. Additionally, it's important to properly care for and clean both your natural hair and the wig to prevent any buildup of dirt, oil, or bacteria that could contribute to hair and scalp issues.
Related: Hair Loss In Women: What Causes It And How To Solve It
Hair Damage: What Causes It And How To Deal With It
Do all lace front wigs have to be glued?
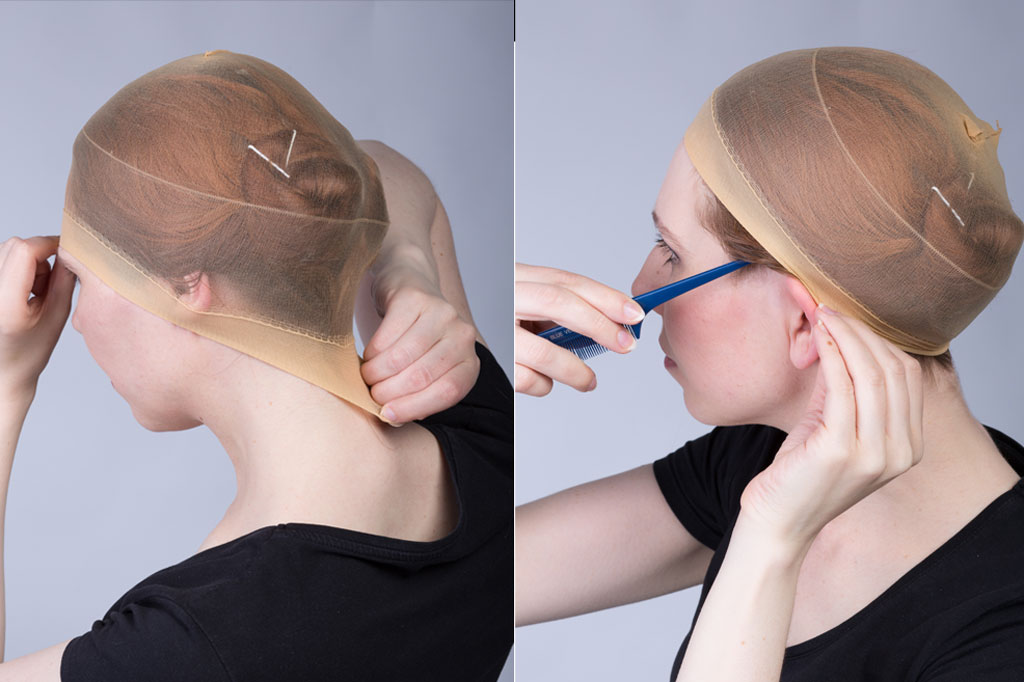
No, not all lace front wigs have to be glued. While many people choose to use adhesives to secure their wigs, there are other methods of attachment that can be used instead. Some people prefer using wig clips or combs, which can be sewn onto the wig and then clipped or snapped onto the natural hair for a more secure fit. Others may choose to use elastic bands or adjustable straps that are built into the wig cap to keep it in place. There are also some types of lace front wigs that come with pre-attached tapes or adhesives, eliminating the need for additional glues or tapes. Ultimately, the best method of attachment will depend on your individual needs and preferences, as well as the type of wig you are wearing. It's important to experiment with different options until you find the one that works best for you.
Related: How to fix a wig in place?
How to melt the lace on the wig?
#1 Cut the front edge of the lace wig
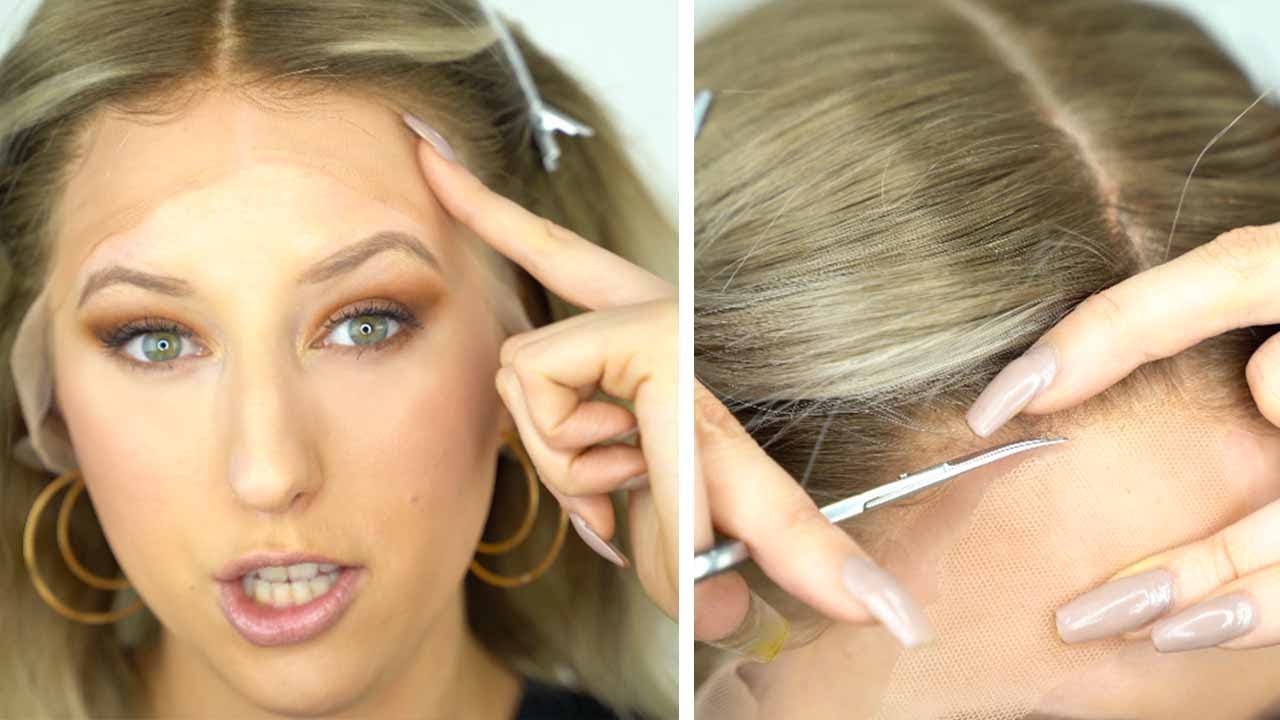
- Put the wig on the wig head. To make cutting easier, place the wig on a wig head. Position the wig on top of the head and cut the lace accordingly. When wearing the wig, insert your hand into it with your knuckles facing upward and pull it over your head starting from the back. If you have a wig head, securing the hair at the back with pins can be helpful. In the absence of a wig head, holding the wig while cutting your hair is also an option. If your natural hairline is slightly curved, try placing the wig on your head to determine how best to cut it.
- Use sharp scissors will allow for a cleaner and more precise cut. Dull scissors can result in jagged edges, which can make the lace look unnatural when worn. It's also important to hold the lace firmly while cutting to ensure evenness and prevent slippage. This can be achieved by using clips or pins to secure the lace in place before cutting. If you're holding the wig in your hand, rotating it as necessary will help maintain a straight line. This is particularly important when cutting curved or angled shapes, such as bangs or layers. By rotating the wig as you cut, you can ensure that both sides are symmetrical and the final result is cohesive.
- Cut the lace as close to the hairline as possible, particularly around the silicone band. Certain types of lace feature a silicone band that attaches to both sides of the hairline. Failing to trim it off closely alongside the hairline will result in visible gaps when you wear the wig. The silicone band runs parallel to the hairline before curving into it. Trim the lace very close to where the band curves into the hairline to eliminate the silicone band entirely.
- Trim the remaining lace close to the hairline. Begin cutting from the sideburns and proceed straight across the wig, ensuring that you don't cut the delicate wispy hairs. It's acceptable to leave up to 0.25 inches (6.4 mm) of lace in front of the hairline, although some experts argue that this technique results in too much of the lace being visible. Use the wig's natural hairline as a reference while cutting. If necessary, make slight modifications, such as creating a small dip in the center for a widow's peak.
#2 Pluck the front hairline
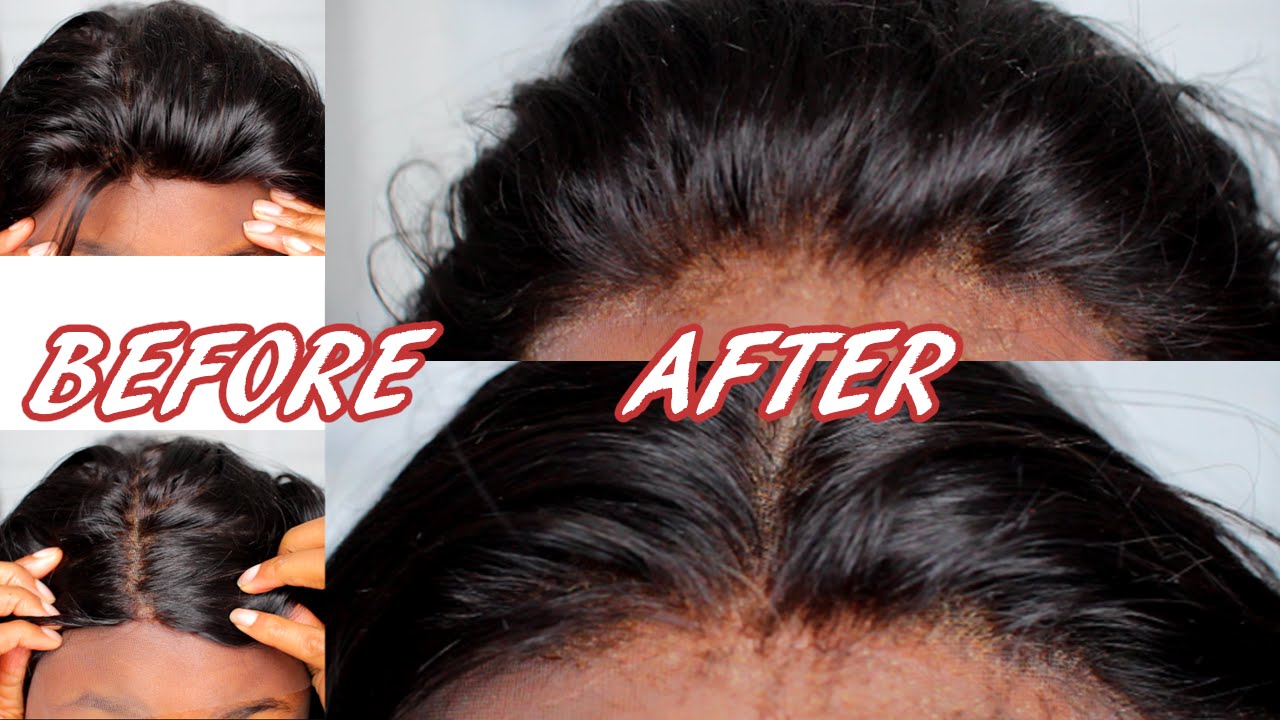
- Moisten the hair and split it into three equal parts. In order to facilitate the plucking process, spritz water onto the hairline to dampen it. Produce partitions at the temples by using a comb. Take the first division from the right temple towards the rear of the head and the second division from the left temple towards the back of the head. This will result in three sections. Attach the hair with clips in these individual sections, preferably securing them onto a wig head. Tackle one section at a time for ease.
- Divide the hair into sections, and then select one section to work with first. Within that section, identify the very first row of hair (i.e. the row closest to the forehead), and separate it from the rest of the hair. Use a rat-tail comb to run along the bottom of this first row, starting from the temple and moving towards the sideburns. As you're combing, you should aim to create a very thin row of hair. This means that there should only be 3-6 individual strands of hair in the row. Once you've created your first thin row, you'll want to clip the rest of the hair out of the way, so that you can work on this row without interference. Use hair clips to hold the remaining hair in place, but leave the first row unclipped.
- Using tweezers, remove every second section of hair. Starting with the first section, pull out small bits of hair in groups of 3-6, alternating with leaving the same number of hairs untouched. Continue this process across the row, using your hand to brush away the plucked hairs. The goal is to create a more natural-looking hairline by adding variation to the edge.
- Using a rat-tail comb, create another section of hair by separating it from the previously clipped area. This section should be no more than 3-4 hairs thick. Once you have separated this new section, clip the remaining hair back in position, excluding the row you just pulled out and the one beneath it that you plucked. Ensure that you keep the new row separate from the previous one that you plucked.
- Extract hairs from the newly divided portion. Using tweezers, remove 3-6 hairs at a time, selecting alternate sections in the same row. After each extraction, skip an additional 3-6 hairs before plucking the next set. Discard extracted hair by hand and continue until the end of the row is reached. Repeat this process for 3-4 rows.
- Apply the same hair extraction technique to the other two sections, gradually removing a small amount of hair from each clip. Ensure a complete coverage of each section's entire length, avoiding any missed spots. When working on the middle section, begin at the temples and continue until reaching the opposite temple.
- Pull back all the hair to allow for plucking of more sections. Then, examine the entire hairline for additional variations. To achieve this, pluck small sections along the hairline intermittently while moving back and forth. Avoid staying in one area for too long to prevent bald patches, and use tweezers to remove the hair. Remember to include the previously plucked hair when pulling back all the hair again.
#3 Position your wig

- Prepare your hair. Before you put on the wig, make sure that your hair is prepared in a way that will allow the wig to sit flat and comfortably on your head. If you have long hair, braid or twist it close to your scalp. Alternatively, you can use a wig cap to keep your hair in place. If you have short hair, make sure that it's smoothed down and not sticking up in any places.
- Place the wig on your head. Hold the wig by the sides with the label at the back. Tilt your head slightly forward and position the front of the wig at your natural hairline, using your fingers to pull the wig downwards over your head. Once the wig is in place, adjust it so that it sits as far back on your head as possible without exposing your own hairline.
- Position the wig correctly. The ear tabs on the wig should be even and aligned with your ears. The center of the wig should be positioned at the center of your forehead. Make sure that the wig is centered and symmetrical by checking that the distance between the wig on each side of your forehead is equal.
- Secure the wig. If you're using adhesive, apply a thin layer around the perimeter of your hairline or where the lace touches your skin. Wait for the adhesive to become tacky, then gently press the wig onto your head starting from the center and working outwards towards the sides. Smooth the wig down as you go to ensure it's securely attached. If you're using wig clips, attach them to the wig and snap them onto your own hair. Place the clips behind your ears and at the nape of your neck.
- Make final adjustments. After securing the wig, make any final adjustments to the positioning and style as needed. Use a comb or brush to blend your natural hair with the wig, especially around the hairline and temples. If needed, use a bit of hairspray or styling product to tame any flyaways or set the style in place.
#4 Make lace edges invisible
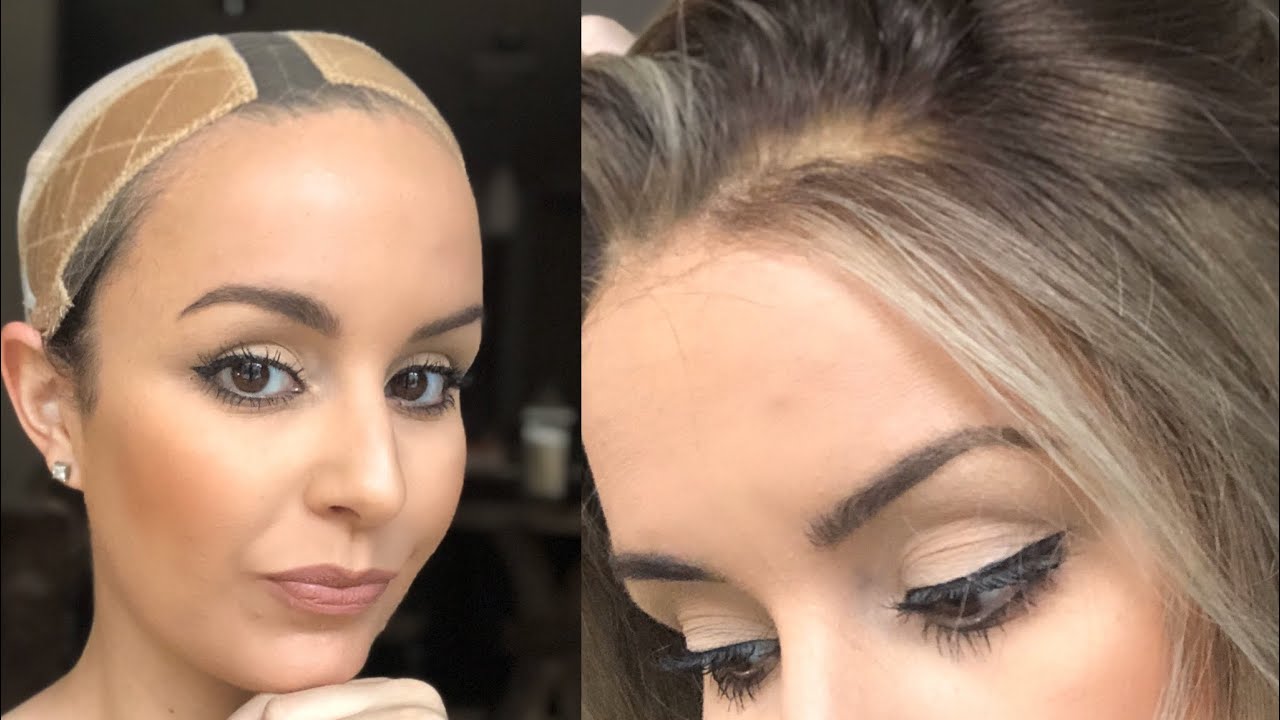
- To safeguard your hair and secure your wig, encircle a slim, pliable, crepe-like paper strip around your hairline for at least 10 minutes while the lace adheres to your scalp. Fasten the strip's center above your hairline and knot it at the back of your neck. This is an excellent opportunity to focus on putting on your makeup or outfit, or simply take a break. You may keep the wrap strip on for a more extended time; some individuals leave it on for an hour or more while styling their hair or applying makeup. These strips are available for purchase at beauty/cosmetic stores or online.
- After the wig has been positioned correctly, the wrap strip needs to be removed. To do this, gently peel off the wrap strip, being careful not to disturb the wig's placement. Once the strip has been removed, you will likely see some remaining lace around the edges of the wig. This excess lace needs to be trimmed away with a pair of scissors. Once the excess lace has been cut away, you can test the adherence of the wig by delicately pulling up on the lace and checking to see if the wig stays in place. If the wig comes loose when pulled, it may be because the freeze spray application was not sufficient. In this case, you could consider repeating the freeze spray application and using more product to ensure better adhesion between the wig and your scalp. It's important to follow the manufacturer's instructions carefully when applying a lace front wig to ensure the best possible fit and longevity of the wig.
- To remove the excess lace, utilize a sharp pair of scissors and trim as close to your hairline as feasible while using a zigzag pattern. Trim continuously until no more excess lace remains. Although some small portions of the lace may still protrude, you can address those in the following step. A zigzag pattern will provide a more realistic hairline and allow for closer cutting around the hairline compared to a straight cut.
- It suggests using a pin-tail comb's pointed end to apply a small amount of hair gel to ensure that the small remaining pieces of lace are smoothed out and lie flat against your scalp. To start, the tip of the pin-tail comb should be loaded with a minute quantity of hair gel. The gel should be applied gently along the wig's hairline edges, with care taken to cover the entire hairline as necessary. Whenever more gel is needed, it can be reapplied to the comb. Using only a small amount of gel is recommended to prevent visible residue from forming. However, if any excess gel does accumulate, it can be removed with a damp towel. This process will help create a natural-looking hairline for the wig wearer.
- After melting the remaining lace, employ a hairdryer to desiccate the gel. Turn your dryer to medium or low heat and glide it along your hairline repeatedly. Determine the stickiness of the gel by pressing your finger against it; if it's still damp or adhesive, continue drying until your finger comes away from it completely dry. As an alternative to using the hairdryer, you could add another wrapping strip and let it sit for 15-20 minutes longer.
#5 Enhance the natural look

- Use a moist towel to remove any extra gel from your hairline. Moisten a fresh hand towel and utilize one of its corners to delicately scrub off any apparent dried gel around the front of your hairline. Brush in the direction away from your hairline, towards your face, so as not to displace your wig. Certain gels come in a transparent form while others are white. You may require more time to get rid of the white gel residue.
- To create baby hairs, you can use an eyebrow razor to shave thin strands of hair from the wig, leaving them around 1/2 to 1 inch long. These strands are then styled with an eyebrow brush and gel to create a curling effect on the forehead. It's a good idea to practice on a small section of the wig first, and to take your time and be careful when using the razor. It's also helpful to have a pin-tail comb on hand to help separate out the strands of hair that you want to shave. With patience and practice, you can achieve a natural-looking hairline that makes your wig look even more like real hair.
- To achieve a flawless look, it's recommended to blend your makeup seamlessly along your hairline. However, if the color of the lace matches your skin tone perfectly, this may not be necessary. In case the lace is a different shade, use a small amount of foundation or powder to create a smooth transition from your skin to your hairline. Additionally, don't forget to check the color of your part and apply foundation accordingly to match your skin tone for a seamless finish.
- For a sleek, flat style, you can use a hot comb to smooth down your wig. If your wig is voluminous and doesn't sit as close to your scalp as you want it to, glide the back of the hot comb over small sections of your hair along your part, about 3 to 4 inches (7.6 to 10.2 cm) long. Remember to use medium heat to avoid burning your scalp and keep the hot comb moving instead of holding it in one place. Press down firmly with the comb so that the heat can flatten your hair against your scalp. A hot comb usually works better than a straightener since it allows you to push your hair closer to your scalp, whereas a straightener leaves some space between your hair and scalp.
How long will a lace front wig stay on?

Lace front wigs are typically secured to the scalp using adhesives such as tape, glue or adhesive sprays. The type of adhesive used will affect how long the wig can stay in place. For example, some types of adhesives can provide a stronger hold than others, which can increase the length of time that the wig stays on.
However, the length of time that a lace front wig stays on also depends on the wearer's skin type and level of activity. People with oily skin may find that their wigs loosen or slip off more quickly due to the excess oil breaking down the adhesive. Similarly, people who engage in activities that cause sweating may find that their wigs start to come loose or feel uncomfortable after a shorter period of time.
To ensure the longevity of the wig and to prevent any potential damage or discomfort, it is generally recommended to remove and reapply the wig every 1-2 weeks. This gives the scalp a chance to breathe and helps to avoid any irritation or infection from prolonged wear. It also allows the wearer to inspect and care for both their natural hair and the wig.
Finally, following the manufacturer's instructions for care and maintenance can help extend the lifespan of the wig. This includes regular cleaning, conditioning, and storing the wig properly when not in use. Proper care can help to maintain the quality and appearance of the wig, which can in turn help to prolong its lifespan.
Can you wear lace front wigs everyday?

Yes, it is possible to wear a lace front wig every day. In fact, many people choose to wear lace front wigs as part of their daily routine for various reasons such as convenience, versatility, and style. However, it is important to take proper care of both the wig and your natural hair to maintain healthy scalp conditions. Wearing a wig every day can increase the risk of skin irritation or damage to the scalp if not installed properly or if worn for prolonged periods. To avoid this, it is recommended to give your scalp a break from wearing the wig by removing it at night or during other times when it is not necessary to wear it. In summary, wearing a lace front wig every day is possible, but it requires proper care and maintenance, as well as taking breaks from wearing the wig to allow the scalp to breathe and heal.
Final Thoughts
Discover the secret to achieving a flawless, natural-looking hairline with our complete guide on how to melt the lace on your wig. Follow our easy tips for a seamless finish that lasts, and get ready to turn heads wherever you go. With this simple trick, you'll never struggle with a lace wig again!
If you have any novel ideas, feel free to email us. Struggling with hair loss or baldness? Join our community! We are willing to provide you with detailed consultation and wig/topper guide. In addition, we also accept custom hair toppers. Please contact us!
Images credit: Google, Pinterest, YouTube.

