Background Intro
When it comes to hair loss or thinning hair, a hair topper can be a game-changer. Not only does it provide coverage and volume, but it also allows you to experiment with different styles and looks. However, just like any other hair accessory, customizing your hair topper is essential to achieve that exclusive and natural appearance.
In this article, we will explore the various ways to customize your hair topper, ensuring that you stand out while maintaining a high-quality, perfect look.
Related: Hair Loss In Women: What Causes It And How To Solve It
What Makes Hair Toppers The Wonderful Choice For Thinning Hair?
What are you required to know about hair toppers?
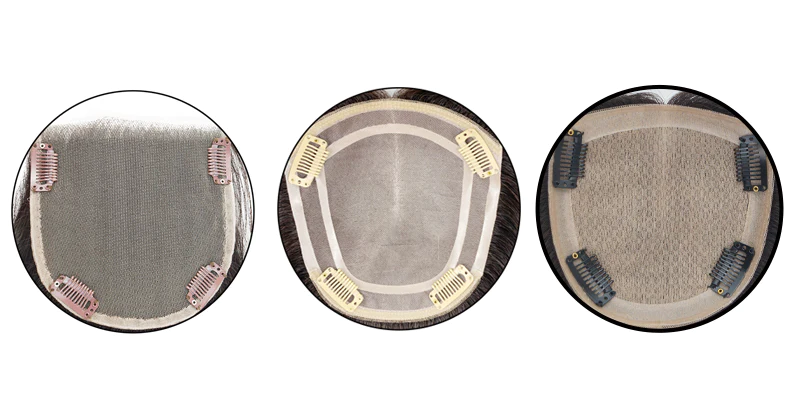
Before customizing your hair topper, it's important to understand its basic components. A hair topper consists of two main parts: the base and the hair strands. The base can be made of lace, monofilament, or silk. Lace bases are lightweight, breathable, and provide a natural-looking hairline. Monofilament bases allow for versatile styling and a realistic scalp appearance. Silk bases offer a strong grip and a natural-looking scalp texture. The hair strands are attached to the base. In addition, considering the hair length, density, and color of your hair topper is also crucial. Hair toppers come in various lengths, from short to long. Density refers to the thickness of the hair topper, ranging from light to heavy. Finally, selecting the right color that closely matches your natural hair color will ensure a seamless blend. Having a comprehensive understanding of your hair topper will help you make better decisions when customizing it to achieve the most natural and flattering look possible.
Related: Get A Seamless Look: Tips For Blending Natural Hair And Lace Front Wigs
How to choose a topper to achieve the desired effect?
Step 1 Determine your individual needs
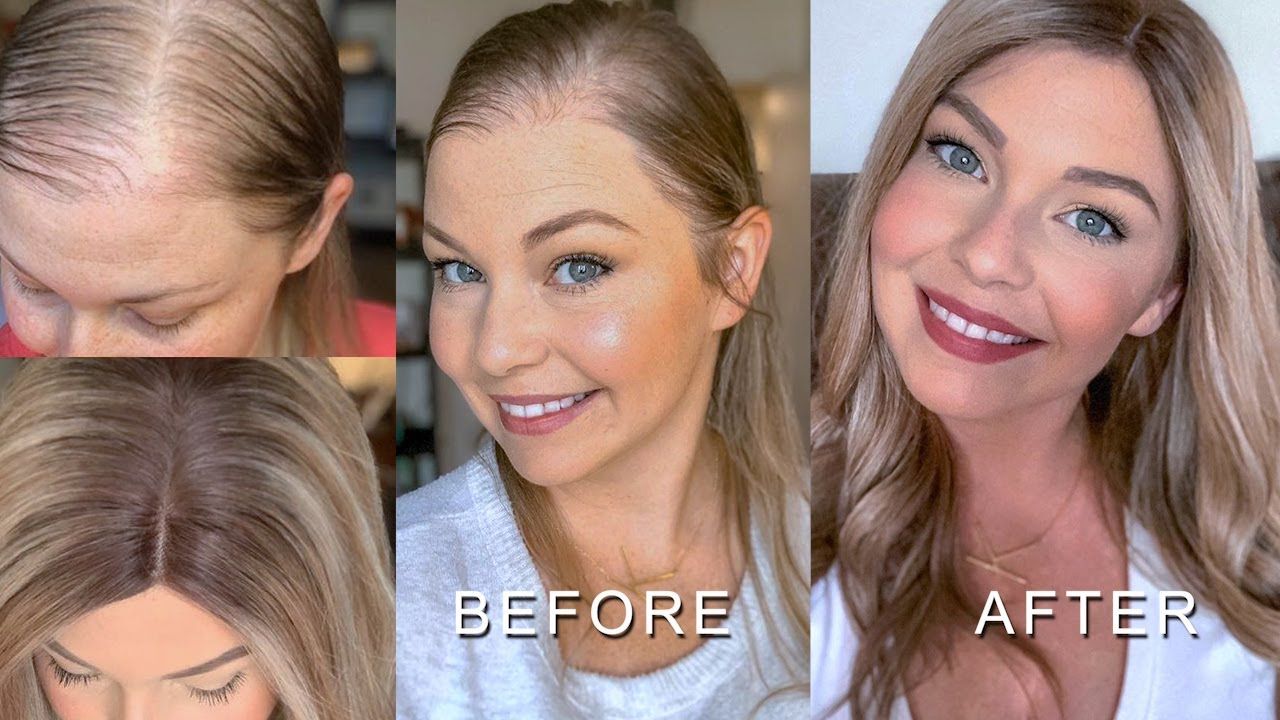
Begin by assessing the specific goals you wish to achieve with your new hair topper. Do you need more volume? Length? Coverage for thinning hair or bald spots? Understanding these precise requirements will play a fundamental role in selecting the ideal type of hair topper. If your primary focus is on amplifying volume, you can explore options that offer specialized design features tailored to this purpose. On the other hand, if length is your primary goal, there are specific hair toppers available that provide seamless integration for a natural look and feel. For those dealing with thinning hair or bald spots, choosing a hairpiece with strategic coverage and a realistic hairline becomes paramount. Through this self-reflection and assessment process, you gain valuable insight into your unique requirements, empowering you to make an informed decision when selecting the perfect hair topper.
Step 2 Choose the right hair type
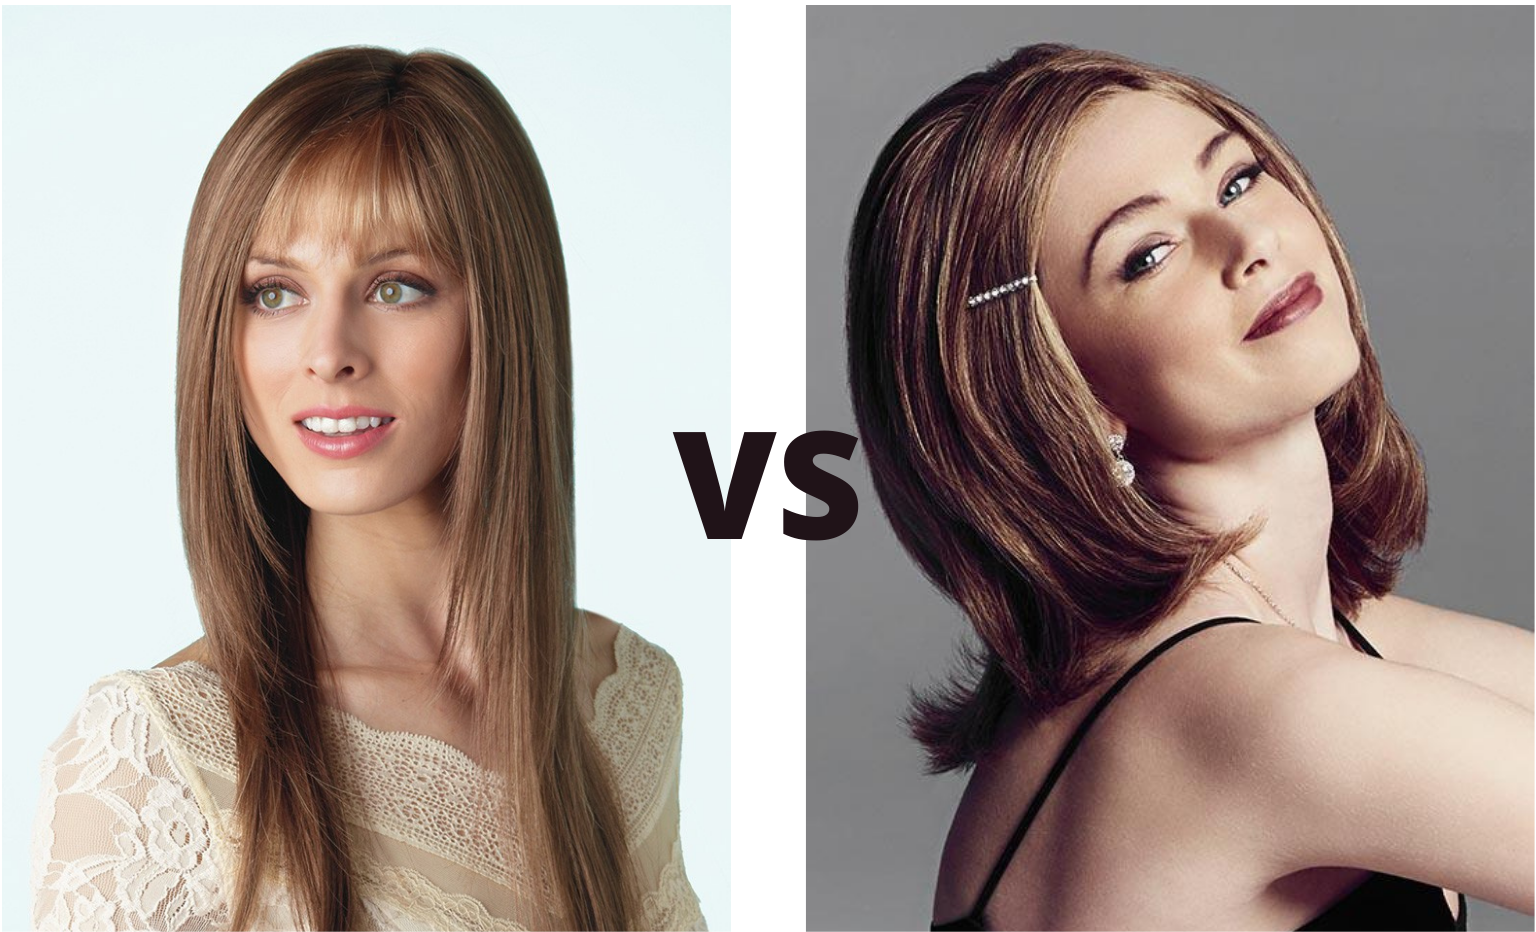
There are several options available, including human hair and synthetic hair, each with its own unique characteristics. Human hair offers a remarkable advantage as it tends to provide the most natural look and exceptional versatility. Its texture, shine, and movement closely resemble that of real hair, effortlessly blending in with your existing locks. With human hair toppers, you can easily style, dye, and even heat-style them just like your own hair. However, it's worth noting that human hair requires more maintenance compared to synthetic alternatives. Regular washing, conditioning, and styling are essential to keep it looking fresh and vibrant. On the other hand, synthetic hair toppers offer an attractive combination of affordability and ease of care. It is pre-styled and retains its shape even after washing, cutting down on styling time. If you value a natural appearance and have the dedication to maintain it, human hair may be the ideal option. Conversely, if convenience and cost-effectiveness are your priorities, synthetic hair provides a practical alternative.
Related: How To Choose Your First Human Hair Topper?
How To Choose Your First Human Hair Wig?
How to customize your hair topper for a unique look?
Method #1 Customize the Base

Once you've chosen the hair type, it's time to customize it to suit your needs. Here are a few key areas to focus on:
- Base Size and Shape: The size and shape of the base should match your specific needs. You can choose from different dimensions such as oval, round, or rectangular, depending on your desired coverage area and hairstyle.
- Base Color: It's important to select a base color that closely matches your scalp tone for a seamless blend. Choose a base color that complements your natural hair color or the color of the hairpiece you'll be attaching to the topper.
- Density: The density of the base refers to how closely the hair is woven or tied onto it. You can customize the density based on your preferences, whether you prefer a more natural look with a lighter density or a fuller appearance with a higher density.
- Ventilation Method: There are different ventilation methods used to secure the hair to the base, such as hand-tied, machine-tied, or injected. Hand-tied ventilation provides a more natural appearance, while machine-tied or injected methods offer increased durability.
- Additional Features: Depending on your needs, you can add extra features to the base, such as silicone strips or clips for added security, adjustable straps for a better fit, or reinforced areas for areas prone to hair loss.
Method #2 Try Different Placement
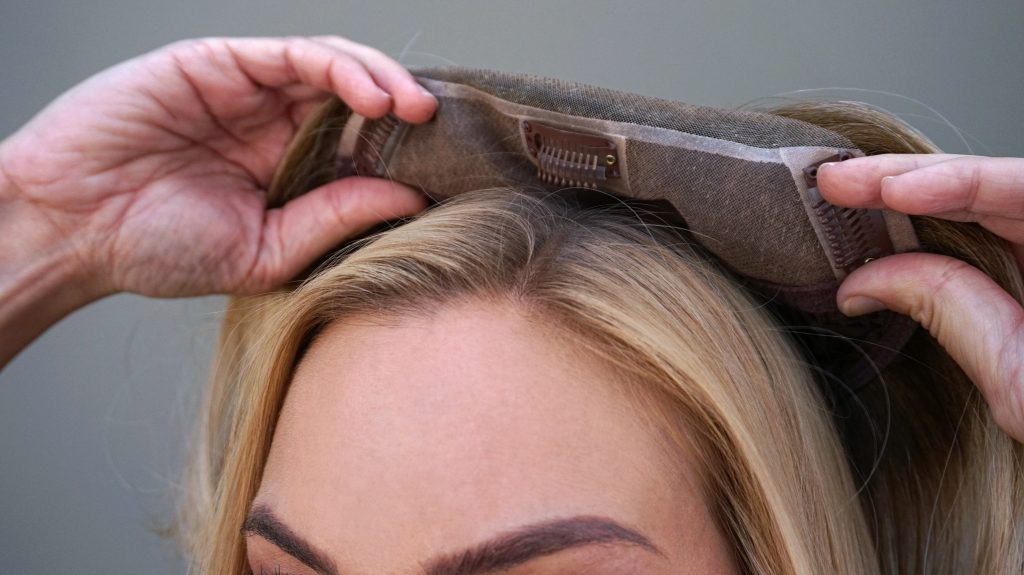
Hair toppers offer a fantastic opportunity to experiment with different placements and create diverse looks that suit your personal style. Here are some tips on how to position hair toppers to create different styles:
- Move it Slightly Forward: One technique to try is moving the hair topper slightly forward to add volume at the crown area. This placement creates a boosted and fuller appearance, perfect for those seeking extra height and body in their hairstyle. By positioning the topper strategically near the front of your natural hairline, you can achieve a voluminous effect that adds an impressive amount of lift without compromising a natural look.
- Pull it Back a Bit: If you're aiming for a more seamless and natural-looking hairline, try placing the hair topper farther back. This positioning ensures that the transition between your natural hair and the topper is subtle, making it difficult for anyone to detect the presence of a hairpiece. This method is particularly useful if you want to maintain the illusion of natural hair growth or when styling your hair into updos or pulled-back styles.
Method #3 Tailor your hairline
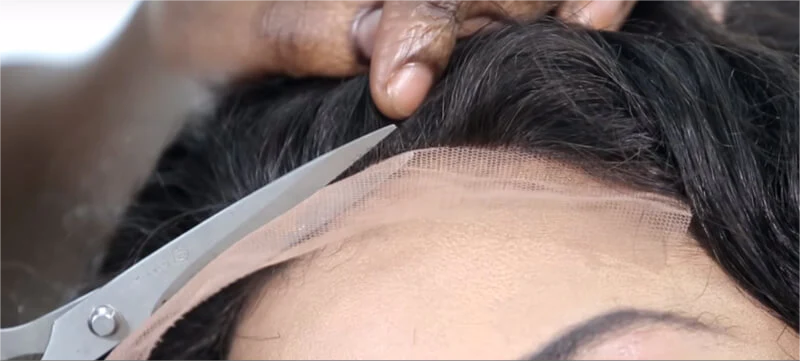
Customizing the hairline with a hair topper can help achieve a more natural and seamless look. Here are some steps you can follow:
- Position the hair topper correctly: Place the hair topper on your head, aligning it with your natural hairline. Adjust its position until it looks balanced and natural.
- Trim the excess lace: Many hair toppers come with a lace front or a sheer material that mimics the appearance of a natural hairline. If the hair topper has excess lace, use sharp scissors to carefully trim it off along the front edge. Be cautious not to cut into the hair strands.
- Blend with your natural hair: If your hair topper doesn't match your hair perfectly, you can style it to blend seamlessly. You can use heat styling tools to curl, straighten, or add waves to both your natural hair and the hair topper. This helps create a cohesive look.
- Style and shape the hairline: Use a comb or your fingers to style the hair around the hairline, making it look natural. You can create small wisps or part the hair in a way that suits your desired look.
- Use concealer: If there are any visible gaps between the hair topper and your scalp, you can use a color-matching concealer to fill them in. Gently dab the concealer along the hairline and blend it with your natural skin tone.
When it comes to customizing the hairline, there are several techniques you can use to achieve different effects. Here are three popular methods:
- Plucking: Using tweezers to remove individual hairs from the hairline for a more natural look or to adjust density. Be careful not to over-pluck.
- Tweezing: Similar to plucking, but with more precision. Helps shape the hairline or remove stray hairs for a softer transition.
- Knot bleaching: Used on wigs or hairpieces with hand-tied hairs. Involves lightening the knots at the root to make them less visible. Seek professional help if unsure.
Related: How to make a hair topper look natural?
Method #4 Experiment with Different Parting Styles
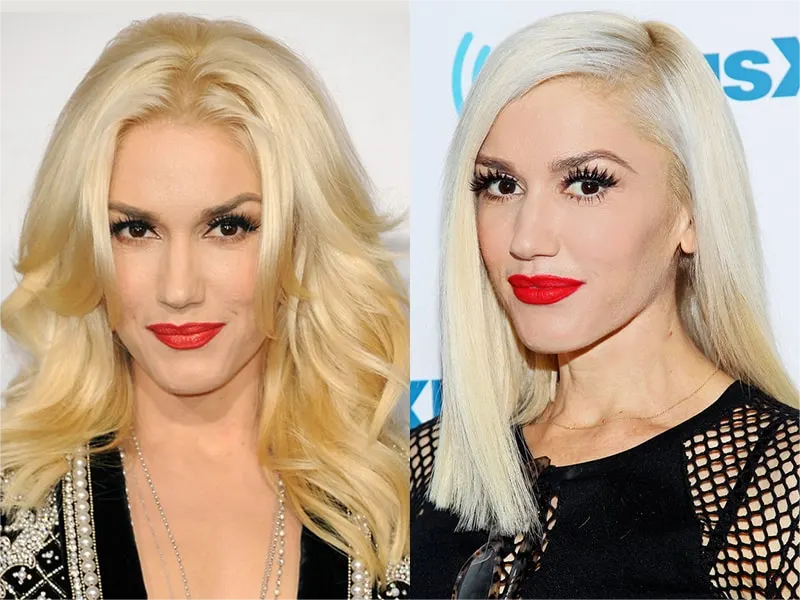
Feel free to experiment with different parting styles and find what makes you feel confident and comfortable. Here are some different parting styles you can try:
- Middle Part: Start by placing the hair topper on your head, aligning it with your natural hairline. Use a comb or your fingers to create a clean middle part down the center of the topper. This classic style gives a balanced look and works well with various hairstyles.
- Side Part: Place the hair topper as usual and then create a side part by combing the hair to one side. You can choose to have a deep side part for a more dramatic look or a subtle side part for a softer appearance. Experiment with different angles to see what suits you best.
- Zig-Zag Part: Instead of a straight part, try a zig-zag part for a more dynamic look. Use a comb to create a series of small diagonal parts across the topper, alternating directions to form a zig-zag pattern. This adds a touch of uniqueness and visual interest to your hairstyle.
- Diagonal Part: Create a diagonal part by sectioning the hair at an angle instead of a straight line. This can be done from either the middle or side of the topper, depending on your preference. A diagonal part adds asymmetry and can create a flattering frame for your face.
- No Part (Brushed Back): For a sleek and sophisticated look, brush the hair of your topper straight back, without creating a visible part. Apply some styling product or hairspray to keep the hair in place. This style works well for updos or when you want to showcase other features like earrings or makeup.
Method #5 Style Your Hair Topper
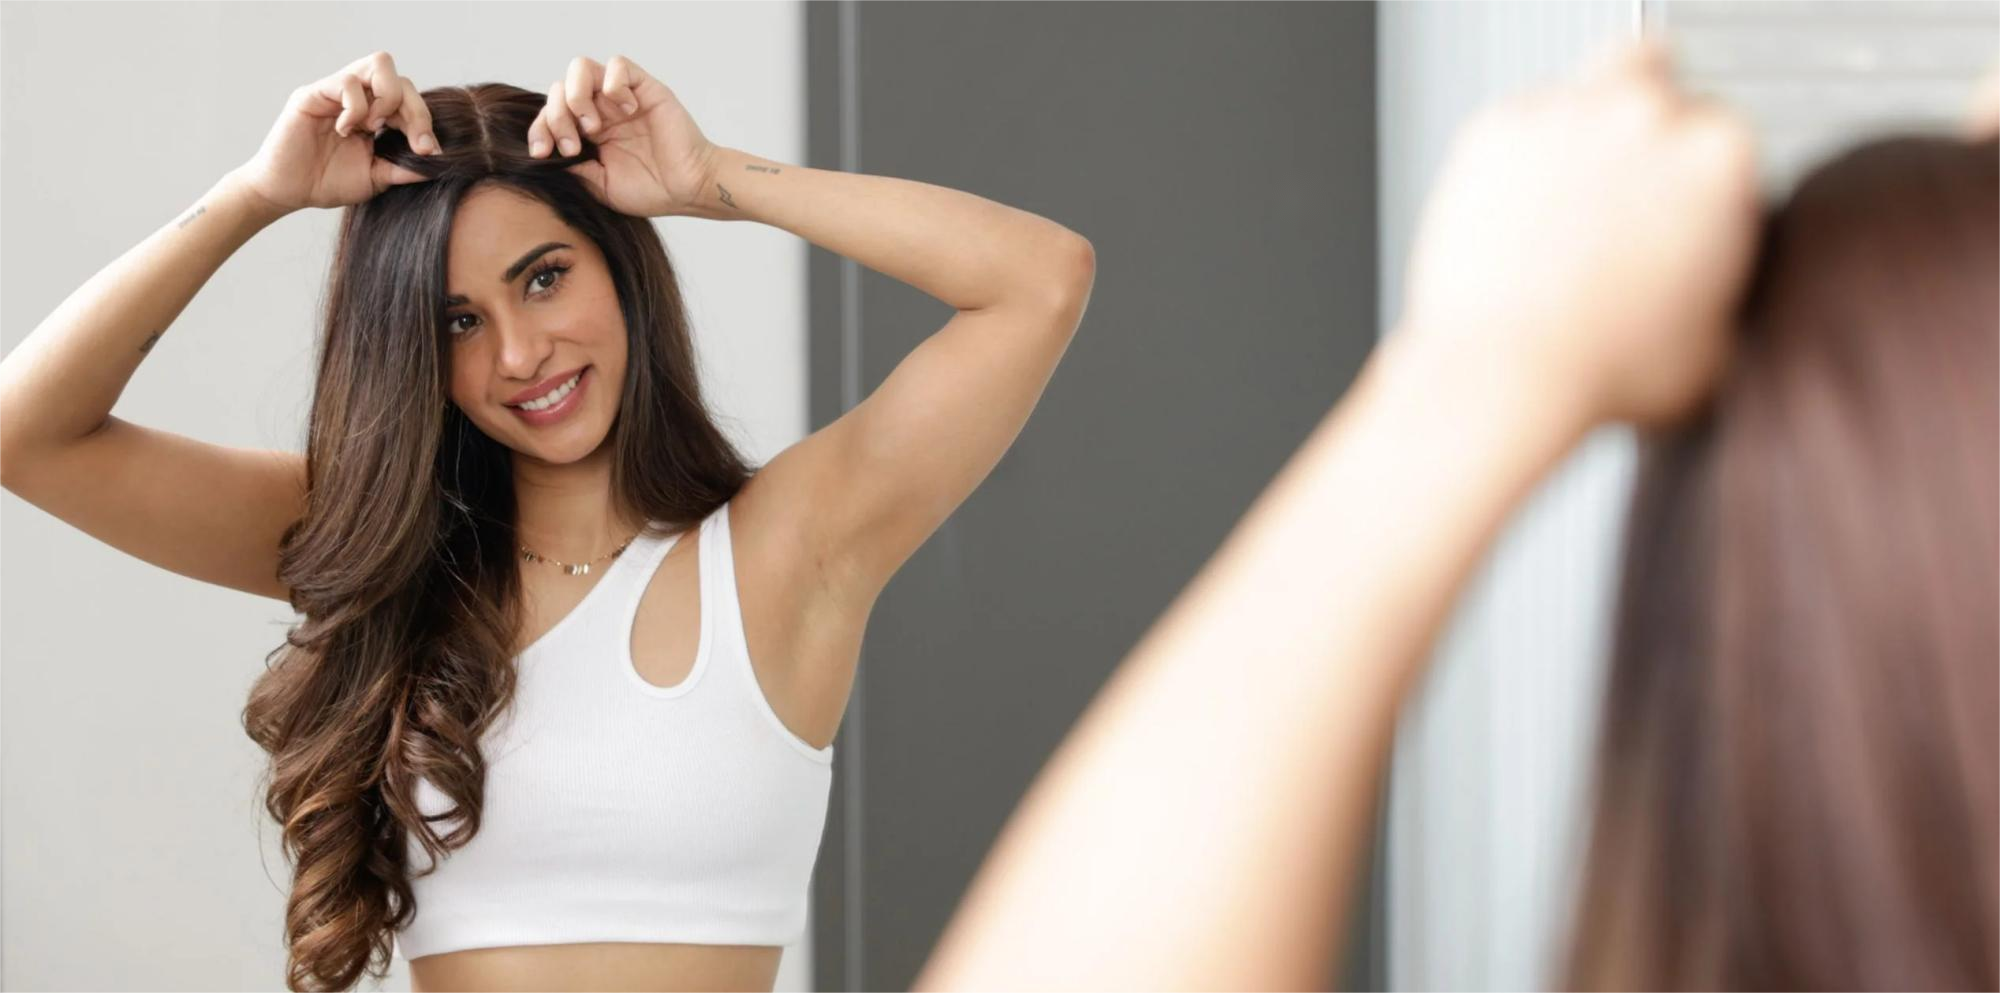
Now that you have customized the base of your hair topper, let's explore how you can style it for an exclusive look:
- Cutting and Blending: Visit a professional hairstylist experienced in working with hair toppers. They can cut and shape the hair topper to match your desired hairstyle and blend it with your natural hair seamlessly. The stylist will trim the length, add layers, and thin out the hair topper as per your requirements.
- Design Your Own Bangs: If you love the look of bangs, but your natural hair doesn't have them, consider getting a hair topper with bangs. This allows you to instantly change your hairstyle and experiment with different fringe styles without committing to a permanent cut.
- Coloring: If necessary, you can consider coloring your hair topper to match your natural hair color or experiment with different highlights and lowlights. However, it is recommended to consult a professional hairstylist experienced in working with hair toppers for the best results. They will ensure that the coloring process is done correctly and does not damage the hair fibers.
- Heat Styling: Most high-quality hair toppers are made of human hair, allowing you to use heat styling tools such as curling irons or straighteners.
Related: How to style human hair toppers?
How to style synthetic hair toppers?
Method #6 Add Volume and Texture
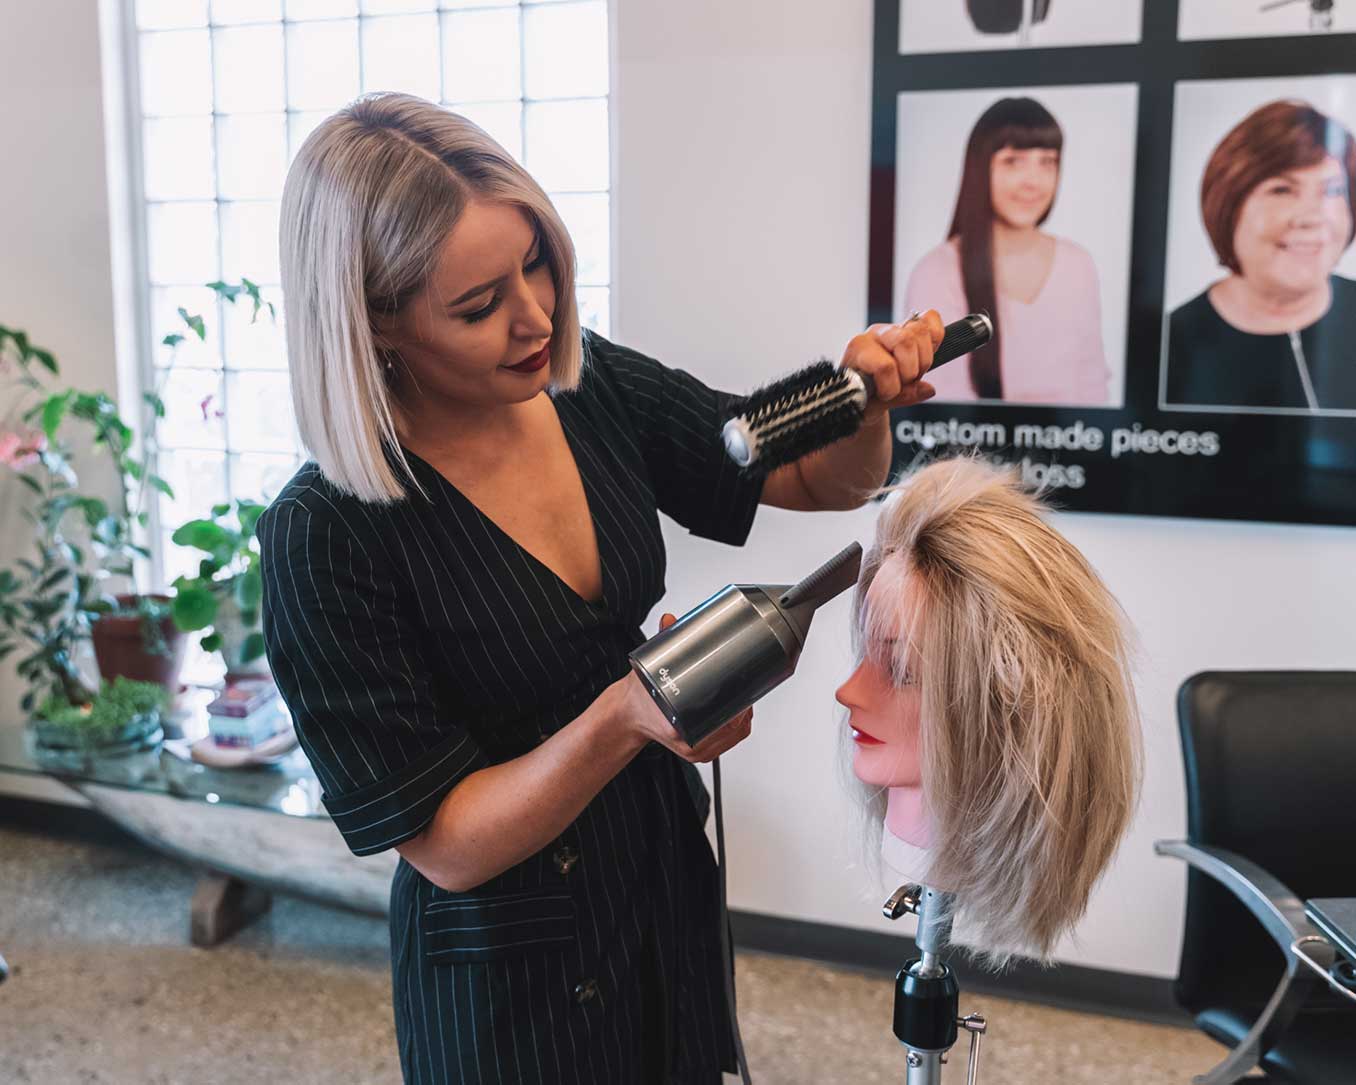
If you want to enhance the volume and texture of your hair topper, there are several effective customization options you can consider:
- Teasing: Teasing or backcombing the hair at the crown area of your hair topper. Using a fine-toothed comb, gently brush the hair downward towards the base. This method creates instant volume and gives the appearance of lifted, fuller hair.
- Using texturizing products: Applying texturizing sprays or powders to the roots and mid-lengths of the hair topper can make a significant difference. These products provide grip and texture, making the hair look thicker and more voluminous. They work by adding body and structure to the hair strands, giving them a fuller and more dynamic appearance.
- Layering: It can be an excellent option if your hair topper has longer hair strands. Layering helps create movement and dimension in the hair, enhancing its overall appearance. It is recommended to consult a professional hairstylist who specializes in working with hair toppers to ensure a seamless blend between the topper and your natural hair. Their expertise will help achieve the desired result and ensure that the hair topper looks natural and well-integrated with your own hair. By combining these customization options, you can effectively add volume and texture to your hair topper, creating a more stylish and natural-looking hairstyle.
Method #7 Transform the Hair Color
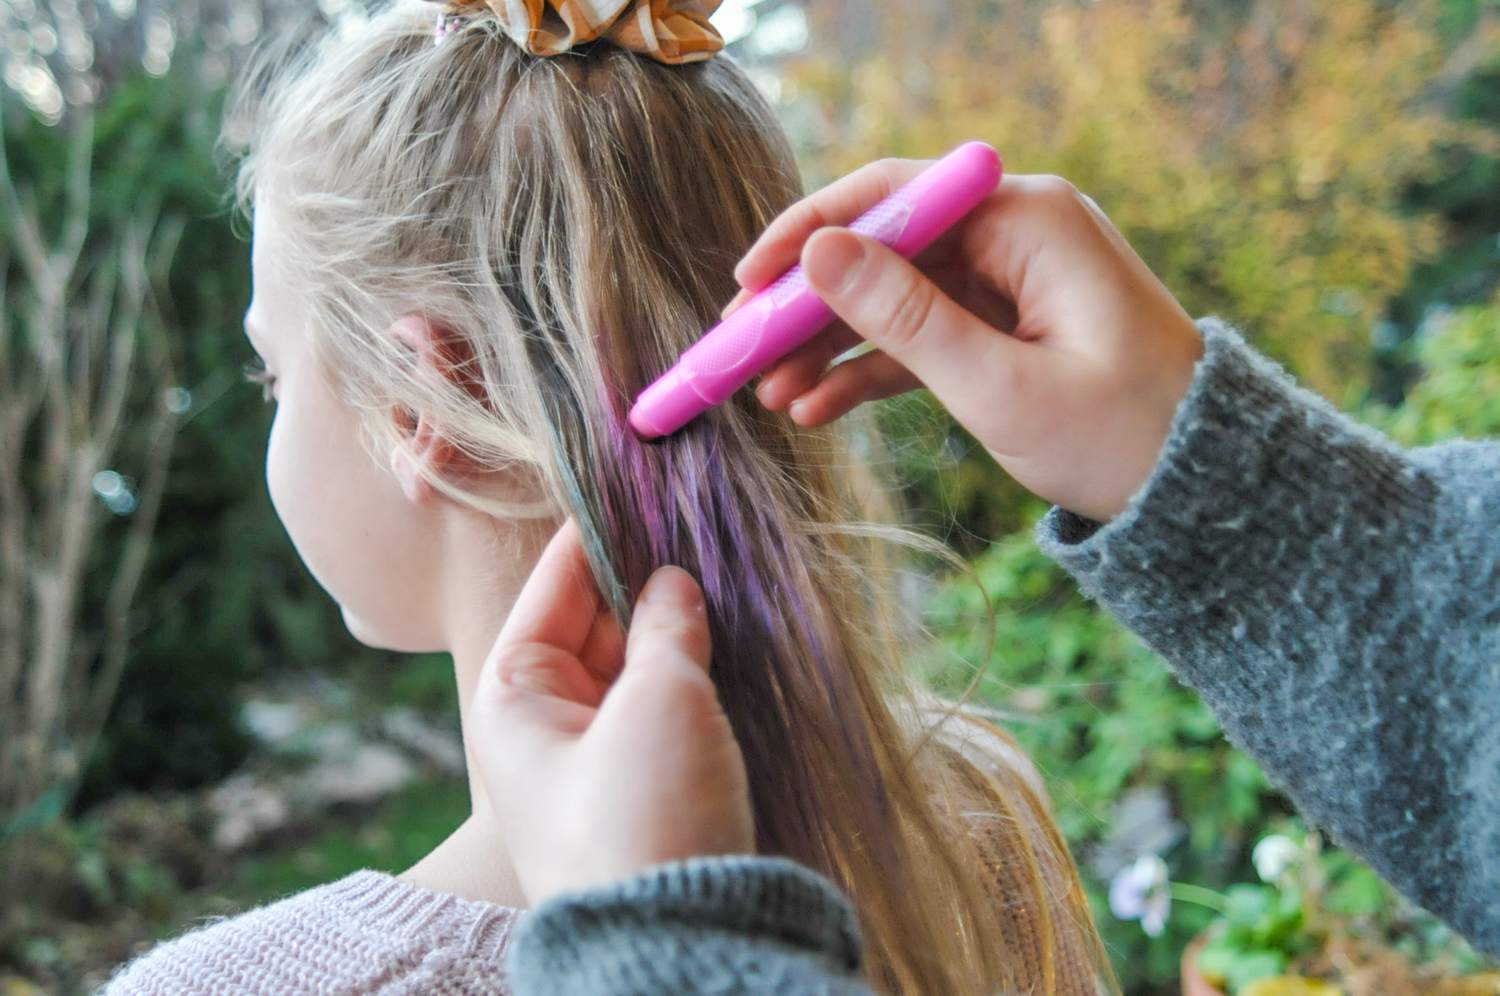
Transforming the color of a hair topper can be an exciting way to change up your look. Here are a few ways you can achieve a new color for your hair topper:
- Temporary Hair Color Sprays: They offer a quick and non-permanent solution. They come in various colors and can be sprayed directly onto the hair topper. This method allows you to experiment with different shades without making a long-term commitment.
- Hair Chalk: Hair chalk is another temporary coloring option. It comes in vibrant hues and can be applied by rubbing the chalk onto the hair strands. This method works well if you want to add colorful highlights or create an ombre effect on your hair topper.
- Fabric Dye: If your hair topper is made from human hair, you can use fabric dye to transform its color. Mix the fabric dye according to the instructions and apply it to the hair strands. Make sure to test the dye on a small section first to ensure the desired result.
- Wig Dye: There are dyes specifically formulated for wigs and hairpieces. These dyes are gentle and designed to work on synthetic hair fibers. Follow the instructions provided with the dye and apply it to the hair topper. Remember to do a patch test first to avoid any unwanted damage.
- Professional Coloring: For a more permanent and customized color change, consider taking your hair topper to a professional hairstylist who specializes in working with hairpieces. They will be able to assess the material of the topper and provide expert advice on achieving the desired color while minimizing damage.
- Clip-in Hair Extensions: If you're looking for a hassle-free option, clip-in hair extensions can be used to add highlights or lowlights to your hair topper. Choose extensions that match the desired color, and simply clip them onto the topper for an instant color transformation.
Related: Bold And Bright: 42 Latest Summer Hair Color Trends For 2023
Method #8 Embrace Your Unique Style
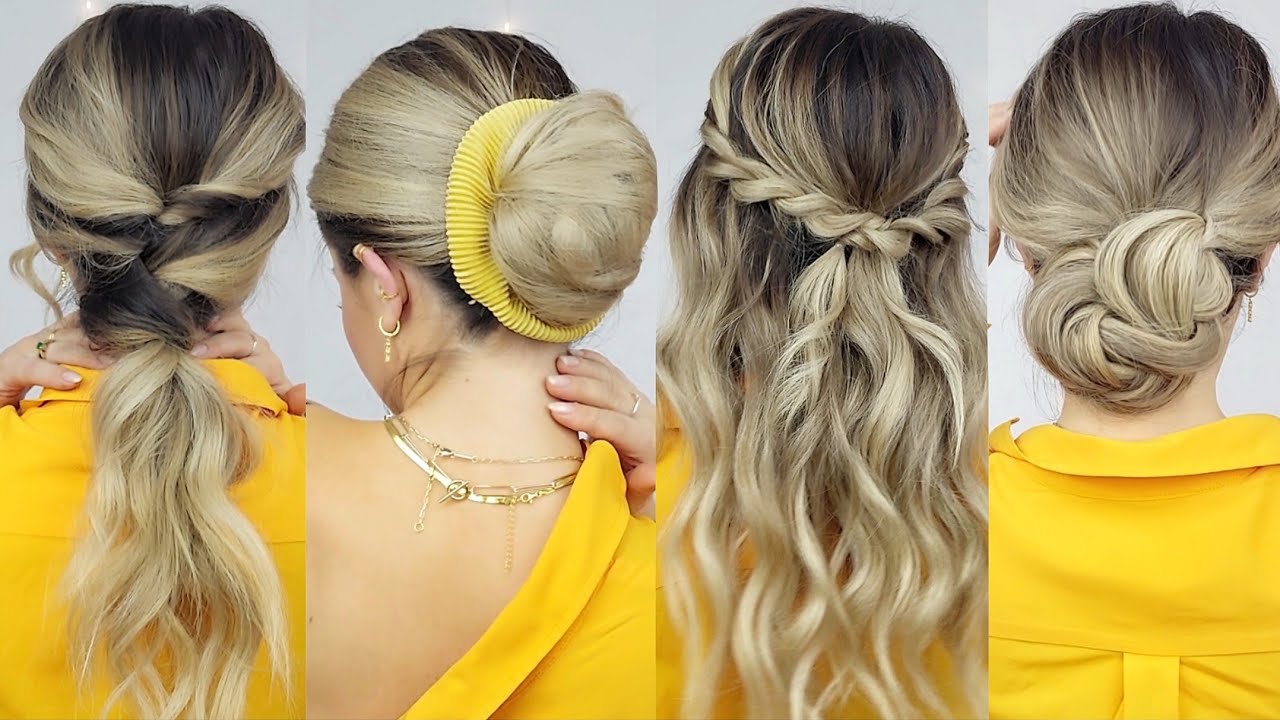
Don't be afraid to step outside your comfort zone and try new hairstyles and looks that make you feel confident and beautiful. You can refer to the hair tutorial below:
-
Updos
- Classic Chignon: Gather your natural hair and the hair topper into a low bun at the nape of your neck. Secure with bobby pins and hairspray for an elegant look.
- Messy Bun: Create a loose, textured bun by twisting your hair and the hair topper together. Pull out a few face-framing strands for a relaxed and effortless style.
- French Twist: Starting at the nape of your neck, twist your hair and the hair topper upwards, tucking in the ends as you go. Secure with bobby pins for a sophisticated updo.
-
Ponytails
- High Ponytail: Gather your natural hair and the hair topper into a high ponytail for a sleek and polished look. Use a hair tie to secure it firmly, and wrap a small section of hair around the base to conceal the hair tie.
- Side Ponytail: Sweep your hair and the hair topper to one side and gather them into a low or mid-level ponytail. This asymmetrical style adds a touch of glamour and is perfect for special occasions.
- Braided Ponytail: Incorporate braids into your ponytail for added texture and visual interest. You can braid a section of hair before securing it into a ponytail or create a fishtail braid using both your natural hair and the hair topper.
-
Braids
- Crown Braid: Separate your hair into two sections horizontally, then braid each section away from your face. Cross the braids at the back of your head and secure them with bobby pins for a regal and feminine look.
- Dutch Braid: Start with three sections at the crown of your head, and weave the outer sections under the middle section, gradually adding more hair as you go. This braid stands out from the scalp for added volume and dimension.
- Side Braid: Gather your hair and the hair topper to one side, then create a traditional three-strand braid or experiment with more intricate braiding styles like fishtail or rope braids.
Method #9 Consider Hair Accessories
When it comes to adding accessories to a topper to match your personal style, there are plenty of options to consider. Here are some ideas:
- Decorative Pins or Brooches: Add some flair to your topper by attaching decorative pins or brooches to it. You can choose pins or brooches that reflect your hobbies, interests, or simply ones that you find visually appealing.
- Ribbons or Bows: Attach ribbons or bows to the edges or corners of your topper for a touch of elegance or playfulness, depending on your style. You can opt for satin ribbons in a color that complements your overall decor scheme.
- Faux Flowers: Incorporating faux flowers into your topper can add a pop of color and natural beauty. Choose flowers that complement your existing decor or go for a bold contrast to make a statement.
- String Lights: If you want to add some sparkle to your topper, string lights can be a great choice. You can wrap them around the edges or drape them across the top to create a magical ambiance.
- Tassels or Pom-Poms: Attach tassels or pom-poms to the corners of your topper for a fun and bohemian look. You can choose tassels or pom-poms in colors that match or contrast with your existing decor.
- Embroidery or Appliques: Consider adding embroidered designs or fabric appliques to your topper for a personalized touch. You can choose designs that reflect your interests, such as animals, plants, or geometric patterns.
- Personalized Monogram: Add a monogram of your initials or a meaningful symbol to your topper. This can be achieved using embroidery, iron-on patches, or even adhesive vinyl decals.
Method #10 Seeking professional advice
https://www.wigshe.com/Seeking professional advice is crucial when it comes to personalizing your look with a hair topper. If you find yourself unsure about the best approach or seeking expert guidance, consider consulting a hair specialist or stylist who can provide invaluable insights. These professionals have extensive knowledge and experience in the field and can offer personalized recommendations tailored specifically to your unique requirements. By considering factors such as your hair type, face shape, and desired style, they can help you choose the most suitable hair topper that complements your features and enhances your overall appearance. Additionally, these experts may even provide styling services, ensuring seamless integration of your topper with your natural hair for a flawless and natural-looking result. With their expertise and skill, you can confidently make informed decisions and achieve a personalized look that boosts your confidence and leaves you feeling fabulous.
Final Thoughts
In this blog, we explored how customizing your hair topper can help you express your unique style. By following the tips shared here, you now have the tools to create a personalized look that reflects your individuality. Remember, customization is an ongoing process that allows you to experiment with different styles and techniques. Embracing your authentic self and confidently showcasing your personal style not only enhances your appearance but also boosts your self-esteem. Unleash your unique look by customizing your hair topper and become a walking masterpiece of self-expression. Start your journey toward hair perfection now!
Images credit: Google, Instagram, Youtube.


